INSTRUCTIONS FOR DATA CONVERSION
From Vitek 2


 To
WHONET
To
WHONET
Version: January 2009
Index
· Instructive Passage Software Data WHONET VITEK 2 to 3
· File creation for export 3
· Recording file 5
· BACLINK settings for data import to WHONET 8
· Import Top 14
· Using data WHONET 16
Instructive Passage Software Data VITEK 2 to WHONET
File creation for export
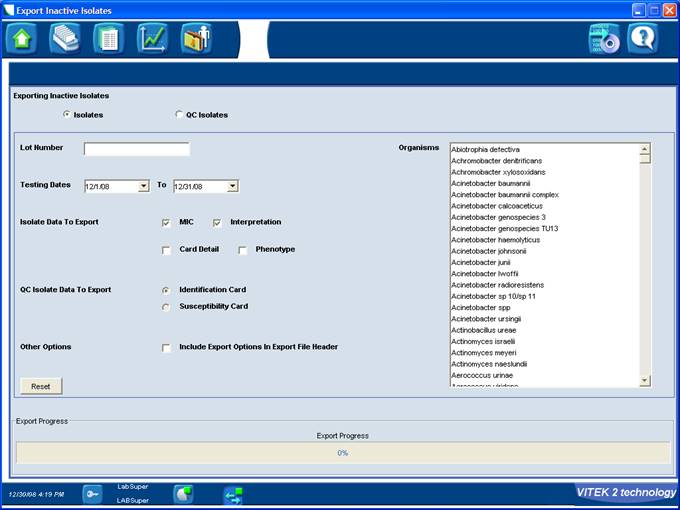
Go to the "Toolbox" icon and choose "Import Inactive Isolates" option


In the next window choose the date range to pass, it is advisable to choose a month time, also tick the options "MIC" and "Interpretation", finally press on the CD icon and arrow.
 |
|||
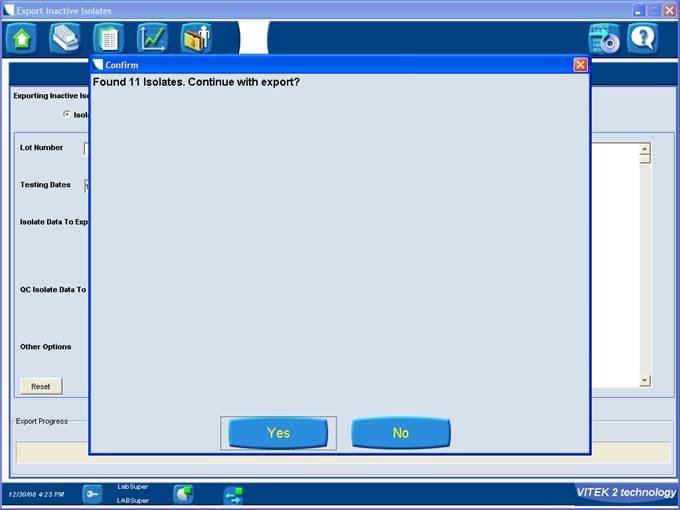
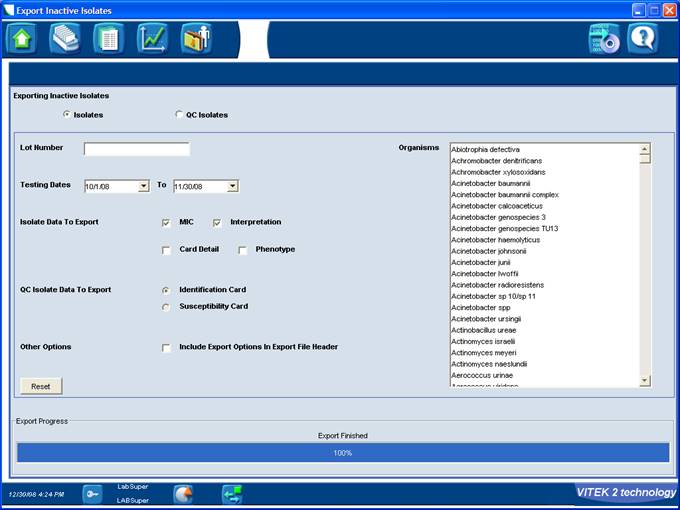
The software will show us the isolates found within the selected range and ask for confirmation for export A window, which calls the file name to save and the destination location (default folder is Lab Files) appears.
![]()
It is recommended as name, standard WHONET "wmesañopais" (for example w0109arg January 2009 for a laboratory Argentina)
NOTE: The file is saved with the extension TXT (text file type)
![]()

The process ended when the "Export Progress" indicator reaches 100%

Recording File
![]() Minimize
Software Vitek 2 technology (with the sign "_" located in the upper
right corner)
Minimize
Software Vitek 2 technology (with the sign "_" located in the upper
right corner)
![]()
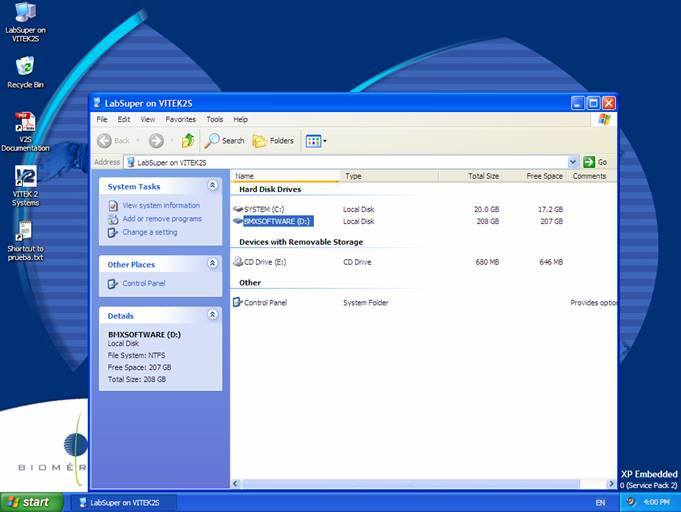
Go to the icon "LabSuper on Vitek2S" or "My Computer" and double-click it, then double click on the "D: BMXSOFTWARE" unit.
Then find the file in the folder "Lab Files"
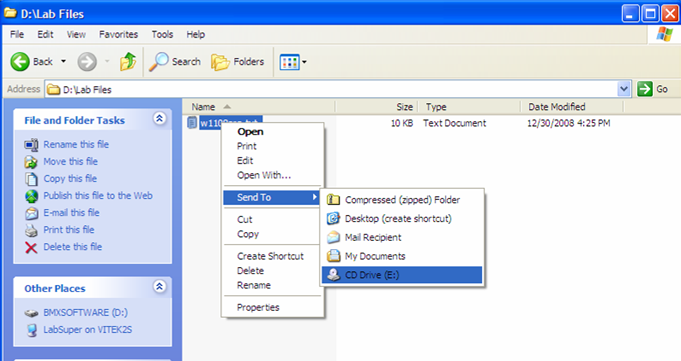
Position on the file (w0109arg.txt) and with the right mouse button find the "Send to" option and choose "CD Drive (E :)" option or choose the recorder system.
![]()
In the lower left side bar when a dialog stating that "you have files waiting to be written on a CD" is displayed


Close the current window (with the "X" in the upper right corner), again double-click on the "LabSuper on Vitek2S" icon this time double-click the "CD Drive (E :)" unit
![]()
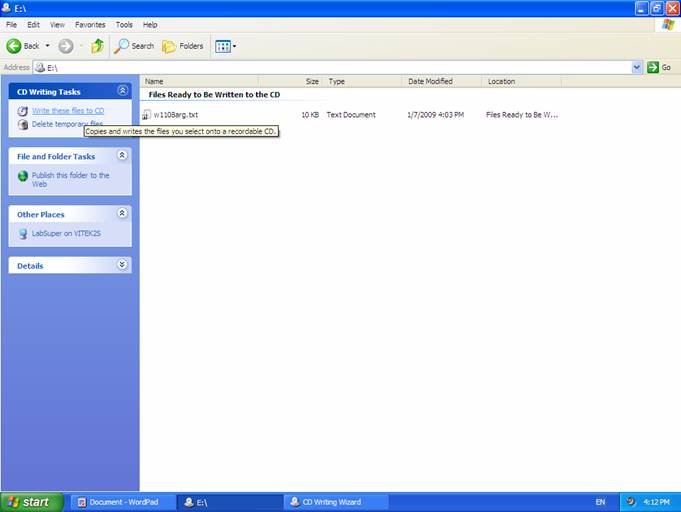
To save the file choose "Write These Files to CD".
![]()
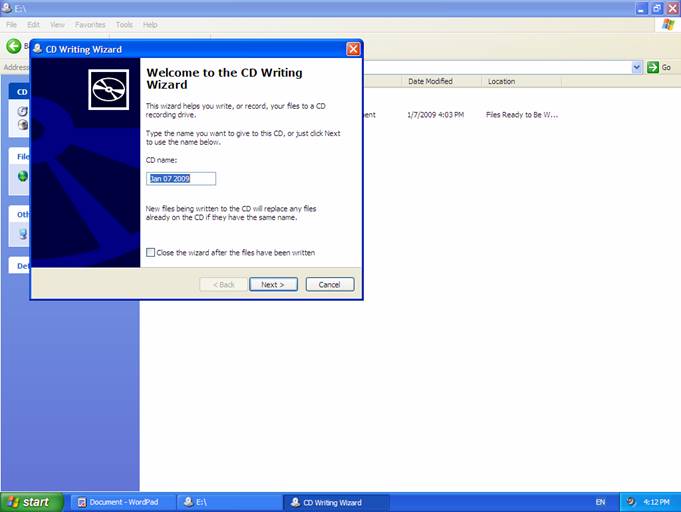
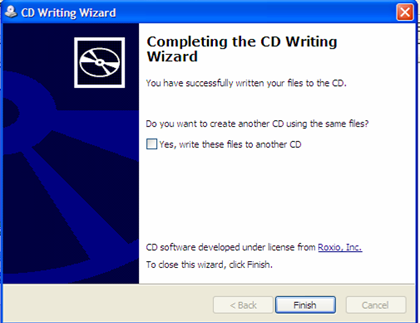
A window with the recording wizard is shown,
Press "Next" or "Cancel"
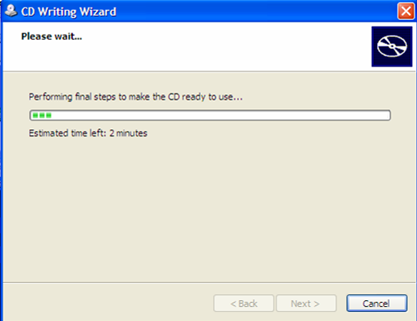
When the process is finished, the next window informing the successful recording is shown. Press "Finish" to finish.
![]()
BACLINK settings for data import to WHONET
Using the CD with the information (data month) on the computer that has installed the software WHONET.
NOTE: When installing WHONET, a complementary program called BACLINK, which serves to import data from other systems installed.
BACLINK run by double clicking on its icon.
Then the next screen will be displayed.
As a first action, click the "Select language" button, and choose the
first "Messages" field, the "Spanish" option and press the
"OK" button to translate the software into Spanish BacLink
![]()
![]()
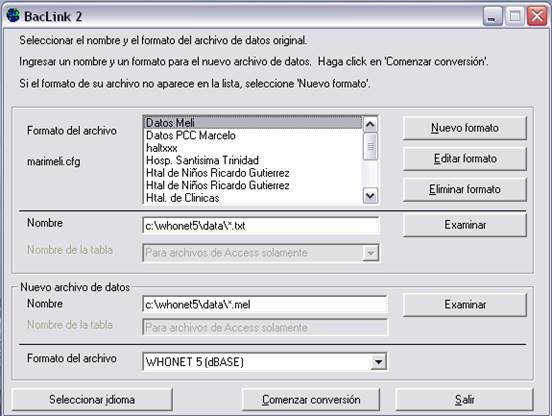
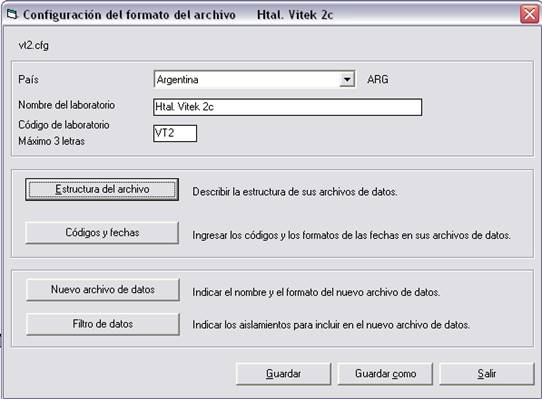
Press the "New Format"
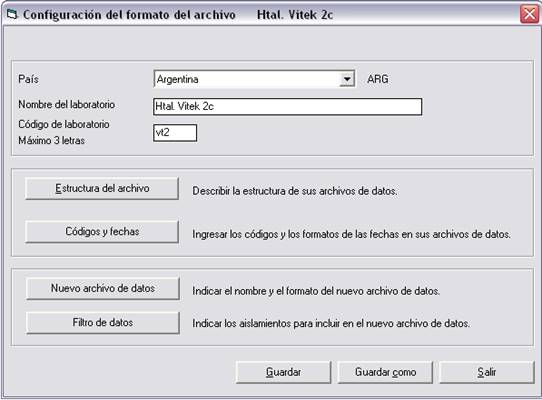
Complete data on the next screen with the "Country", "Name Hospital" and a "code" of three letters that will be used later in the software WHONET
In this case example: Argentina - Htal. Vitek 2c - VT2
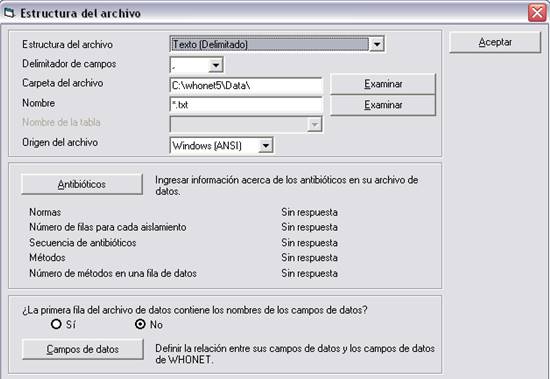
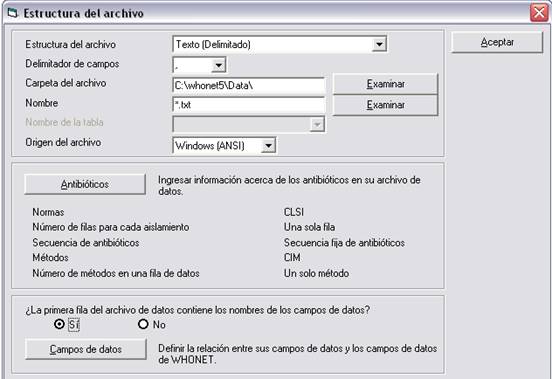
Press the button "File Structure"
![]()
On the next screen, press the "Antibiotics" button
![]()
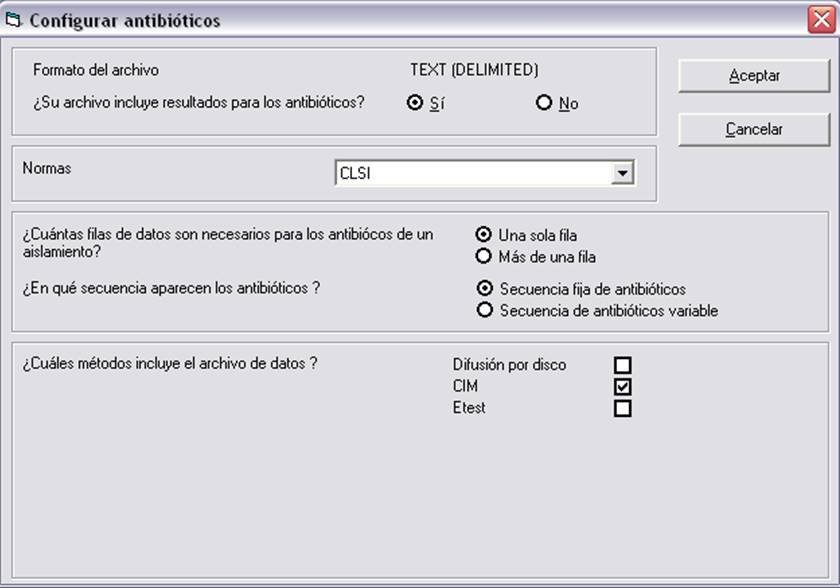
In the configuration window of antibiotics select options, as shown in the next figure and then click "OK":


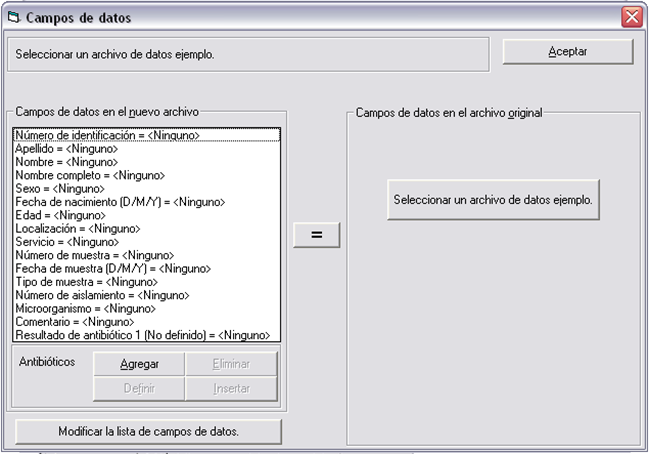
Back in the main configuration window select "Yes" to the question, if the first row of the file contains the name of the data fields and press the "Data Fields" button
![]()
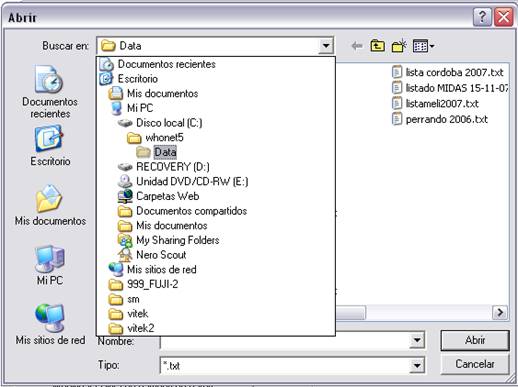
In the Data Fields window click "Select a data file example"
![]()
VITEK locate the file on the CD appropriate and then press
"To open"
![]()
In the next window should associate with their corresponding fields VITEK equivalence of WHONET using the "=" button, the list of fields belongs to WHONET left and the right to list the VITEK fields. (Some fields will not associate <None>)
![]()
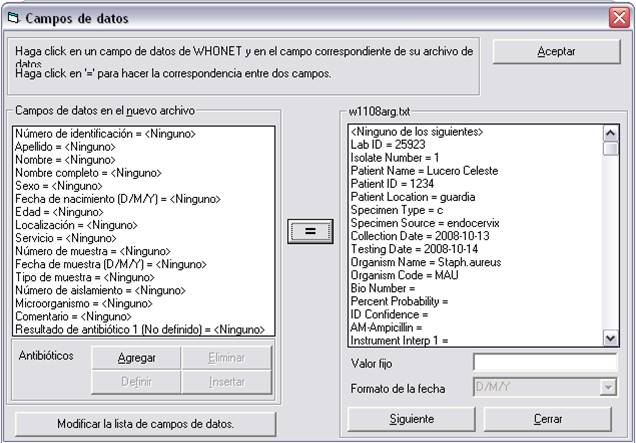
Associating fields are:
Campos Campos WHONET VITEK
Lab Sample ID Number
Isolate NONE Number
Full Name Patient Name
Patient Identification Number ID
Patient Location Location
NONE Type Specimen
Sample Type Specimen Source
Sample Collection Date Date
Testing NONE Date
Organism Organism Name
NONE Organism Code
Bio NONE Number
NONE Percent Probability
NONE ID Confidence
In the case of antibiotics, follow these steps:
![]()
![]()
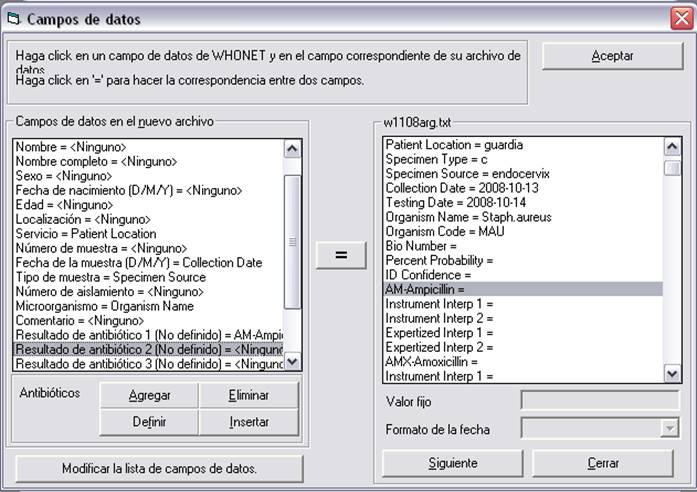
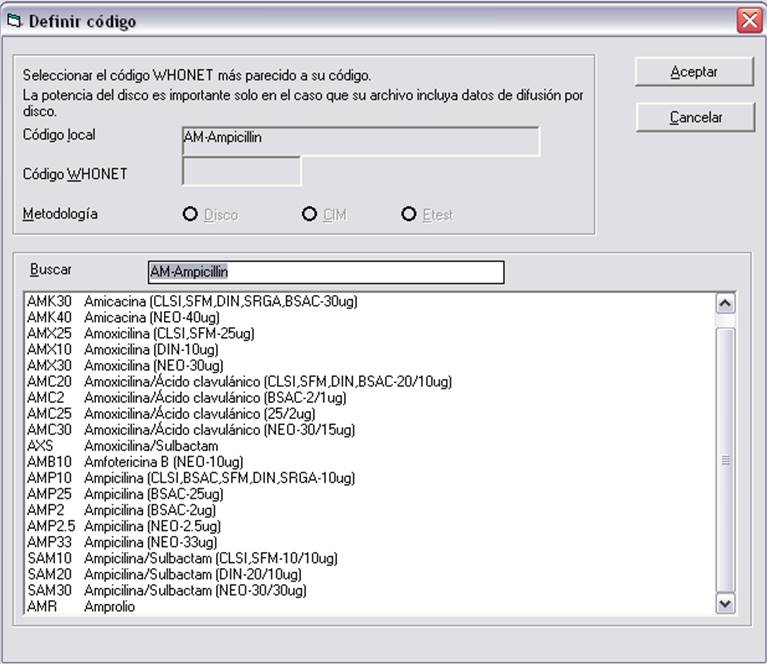
Choosing an antibiotic from the right list (VITEK) and match it with the left list (WHONET) field "Result of antibiotic 1", then define the "Define" button (add a WHONET code listing).
In the list WHONET, repeated antibiotics appear, in the case of VITEK 2 (dilution (CIM)), you can choose any name (code) that corresponds to associate with the drug. Press "OK" to complete the association.

For the next antibiotic, press the "Add" button in the list WHONET, "Result of antibiotic 2" will be added, again repeating the above steps for each of the VITEK antibiotics (with or without results), verify that no antibiotics remain unassociated or undefined, otherwise the BACLINK, report an error and you should review the list of association again.
Note: Only dilutions should be linked. At the moment WHONET not accept interpretations.
At the end of relations fields, press the "OK" button to exit the section antibiotics and again "OK" to exit the file structure.
Again in the configuration screen, click on the "Codes and dates" button,
![]()
in the next window.
![]()

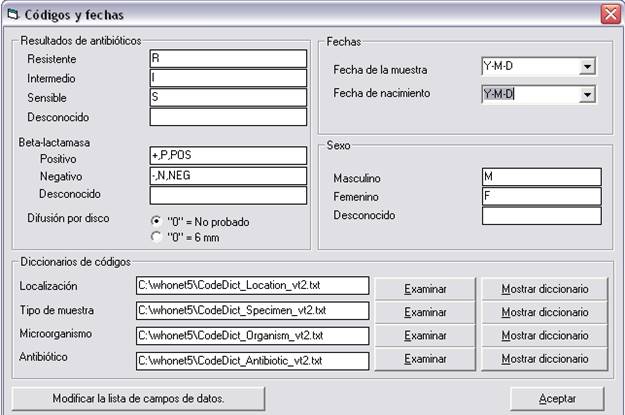
In the area dates, place "Sample Date" and "Date of Birth" in the "Y-M-D" (year-month-day), then press "OK"
In the Setup window click the "Save" button. You must assign a file name configuration. The file is saved by default in the C: \ WHONET5 with the extension ".cfg". Finally press the "Exit" button.
NOTE: The above processes for setting BacLink only be performed only once.
Top Import
On the main screen BACLINK, select the previous setting.
![]()
![]()
![]()
![]()
![]()

![]()
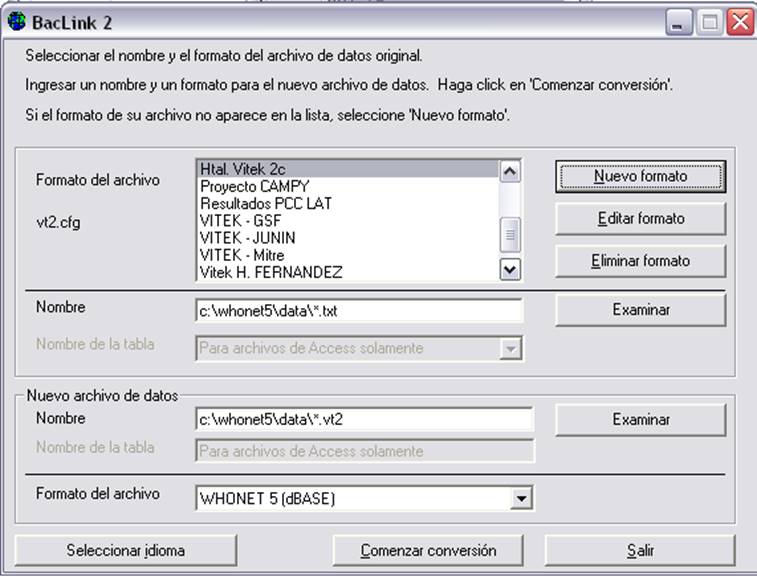
VITEK2 choose the file name for the import saved on the CD. Using the Browse button. (Example: w0109arg.txt)
In the box "New data file" choose the file name become WHONET format. (Example: w0109arg.vt2, data January 2009 Argentina laboratory with VT2 code)
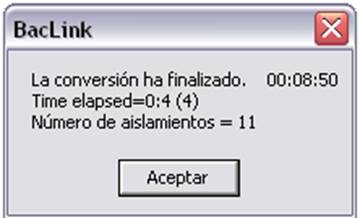
Then click on the "Start Conversion" button, and press the "Next" button three times. When you finish it, reports the successful conversion with a window, which reports the number of isolates converted.
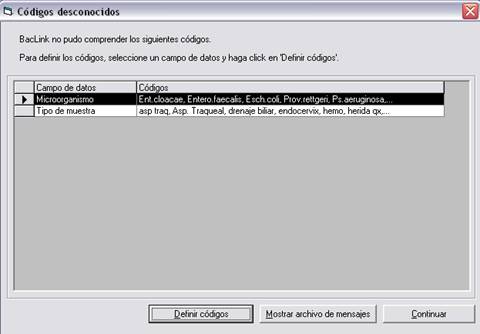
During the first few times BACLINK, show a window asking if you want to review new codes were not recognized. And therefore they were not converted.
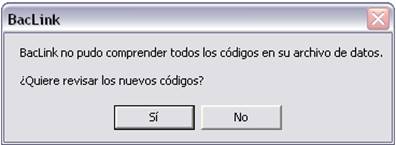
For data to be entered in the WHONET file, you should review the new codes, responding affirmatively.
In the next window. Choose the data fields and define them.
For example, for new codes of microorganisms, shading with the mouse the microorganism field and click on the "Define codes" button.
![]()
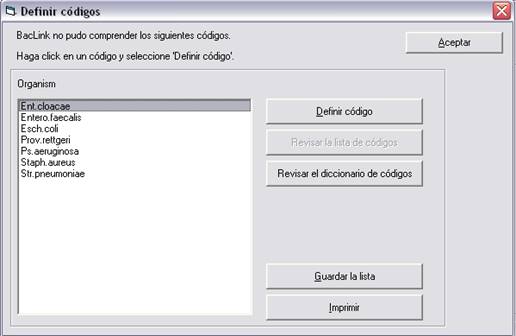
In the next window, in the left list, all unrecognized microorganisms are displayed, select one by one and then press the "Define code"
![]()
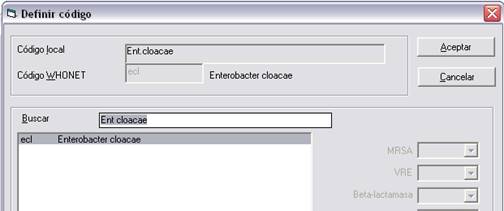
Finally, a list is displayed to choose the microorganism corresponding to WHONET. Delete the "Search" and put the first letters of the genus of the microorganism.
Select it with the mouse and press "OK"
![]()
![]()
Repeat the above operation for all unrecognized microorganisms.
Once finished the recognition of microorganisms. Perform the above steps for all unrecognized in the fields, "Sample Type", "Locations" and "Antibiotics" codes, if necessary.
When there are or wish not define more fields (remember that undefined codes will not be imported). Repeat the conversion operation again.
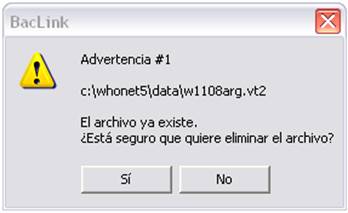
Ignore the two (2) warnings that indicate the file deletion, as it will be replaced with a new one containing the new codes defined.
![]()
NOTE: The file will be saved in the folder C: WHONET5 \ DATA
Using data WHONET
![]() In
case you have set up a laboratory in WHONET software, you must create a basic
configuration lab. To do this, follow these steps:
In
case you have set up a laboratory in WHONET software, you must create a basic
configuration lab. To do this, follow these steps:
WHONET open the program by double clicking the WHONET 54 or 55
Press "Cancel" on the first screen.
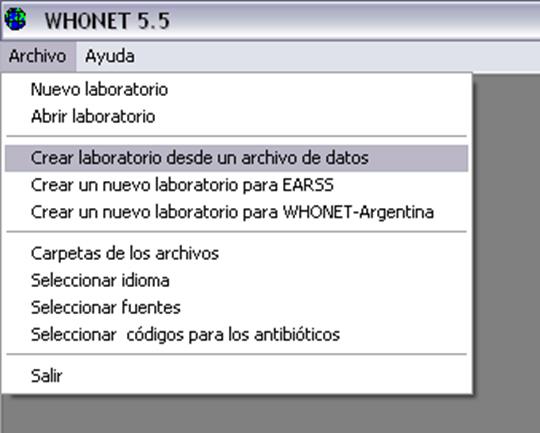
In the "File" menu option press the "Create a laboratory from a data file"
![]()
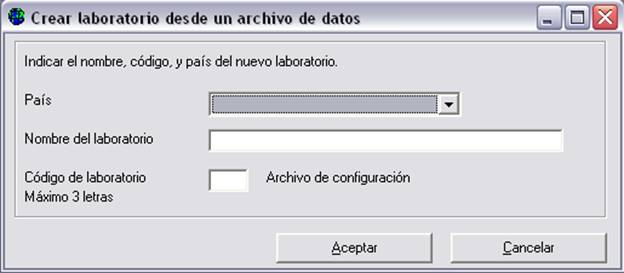
In the next window should complete the information, "Country", "Laboratory name" and "Code". Complete information, with the same data entered in the configuration BacLink, then press "OK".
![]()
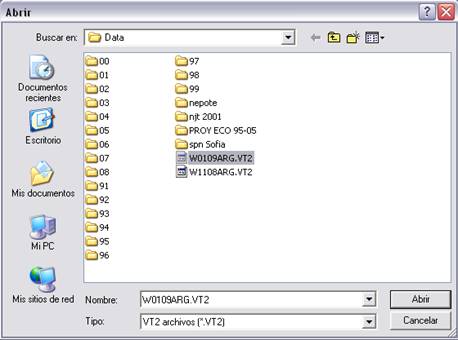
Then the file and the location of it is requested. Locate the file is converted by BacLink (in the w0109arg.vt2 example)
![]()
Finally, he asks, if you want to review the configuration of the new laboratory.
![]()
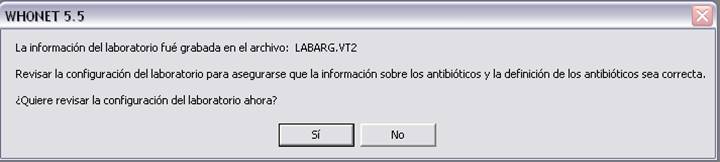
No need to review the configuration to start using data WHONET.
Upon completion of this action, WHONET, enable the options "Data Entry" and "Data Analysis"
The action of creating the laboratory setting is necessary only do it once. From the creation of it, it can e used for future converted files.